Getting Started with rfblocks
The rfblocks environment
The environment in which the rfblocks software operates is
illustrated below in Figure 1. The Python apps running on the host make use
of the rfblocks software to communicate with and control the rfblocks
hardware contained in the module assemblies.
Figure 1: The rfblocks environment.
For module assemblies connected directly to the host communication takes place via a serial device over a USB physical connection. The rfblocks software may also be used to control hardware in a networked environment through the use of the TCP to Serial Bridge.
A minimal rfblocks hardware setup
The quickest way to get started with rfblocks is to make use of the
PiPico or Atmega16U2 controller module loaded with the ECApp firmware
together with one of the RF Blocks SPI controlled hardware modules. In this
example we use the AD9552 based clock generator module.
Figure 2 shows the controller module (USBCtl) and the AD9552 module (ClkGen2) with the required connections.
Figure 2: Minimal rfblocks hardware configuration.
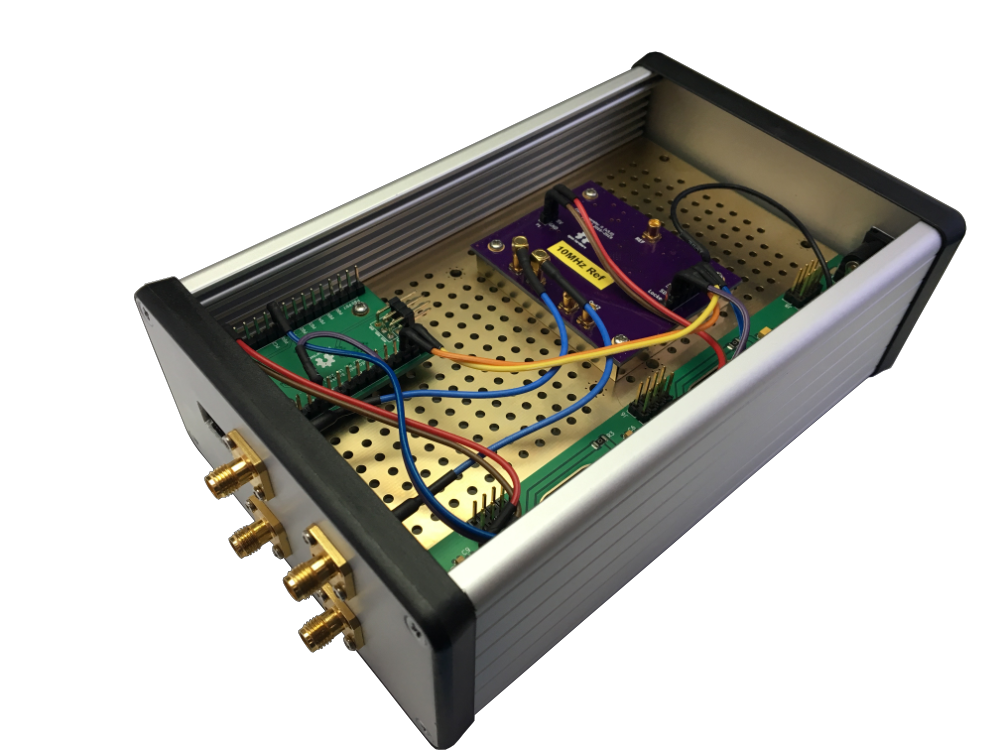
The modules are mounted on a 1455N160 carrier board which is assembled in an enclosure with the clock generator outputs routed to SMA connectors. The controller module can now be connected to the host computer USB interface and the carrier board powered on using a 12V DC supply. The SMA outputs on the enclosure can be connected to instruments to measure the clock generator output. Figure 3 shows the arrangement.

Figure 3: Minimal clock generator hardware arrangement.
The AD9552 module Applications Information section provides some sample Python code which is used to control the output of the module.
Using rfblocks without hardware
If appropriate hardware isn’t available then it’s still possible to run
rfblocks. This might be useful for examining the low level SPI
commands which are used to control the various devices.
To take the place of a actual serial device connected through to the
ECApp firmware use socat together with the virt_ecapp.py script:
cd rfblocks/scripts
socat PTY,link=./virtual-tty,raw,echo=0 EXEC:virt_ecapp.py
This starts a subprocess running the script virt_ecapp.py and creates a ‘virtual’ serial device which is connected to the stdin and stdout of the subprocess. The link parameter requests socat to create a symlink to the actual device file in the current directory - this is for convenience.
Note that the serial device is configured by default with a baudrate of 38400. Here’s some example code which makes use of the device:
from rfblocks import ad9552, create_serial, write_cmd

clkgen = ad9552(**{'cs': 'D0', 'lockdetect': 'C4', 'reset': None,
                   'fref': 10.0, 'refselect': 'D1'})
ser = create_serial('virtual-tty', baudrate=38400)
write_cmd(ser, clkgen.pin_config())
When this is executed, the socat command output would look something similar to the following:
Cmd: OD0:HD0:IC4:OD1:HD1:
and shows the command string which would be sent to the ECApp
firmware in order to configure the microcontroller pins for the clock
generator board.